Sunday, June 17, 2012

IACS Endersession Dory Skiff Daisy, part 2

(Go back to part 1)

Happy Father's Day! Yesterday my daughter Shelby graduated from high school at Innovation Academy Charter School, in Tyngsboro, MA. Congratulations, Shelby, and thanks to all the teachers and staff at IACS!

This past year, through the IACS senior internship program (part of what puts the "innovation" into IACS), she spent Wednesday afternoons working with me at Dell/EqualLogic doing software testing, learning management of iSCSI Storage Area Networks and Python programming for our test tools. She'll continue to work there for the summer, then heads off to Hampshire College to study math. It was one of the greatest pleasures of my life to have her working with me.

(On a related note, my son, unable to find a suitable position through the normal co-cop placement process as a biology major at Drexel University, ended up working as a temporary research assistant for an anesthesiologist at Brigham and Women's Hospital in Boston, where my wife is a surgical nurse. BWH is one of the premier hospitals in the world; when the absolute worst happens to you, this is one of the places that can put you back together. Pretty much by random chance, both our kids have ended up with plum summer jobs through their parents. There's a whole discussion in all that about providing opportunities for our next generation of workers.)

I helped out again for two days this week with the boatbuilding endersession project at the school. This was a continuation of the project started last June, building Harry Bryan's dory skiff "Daisy". Several new students worked on it this year, along with several returning from last year. Shelby chose the art museum endersession, visiting a different museum each day of the week.

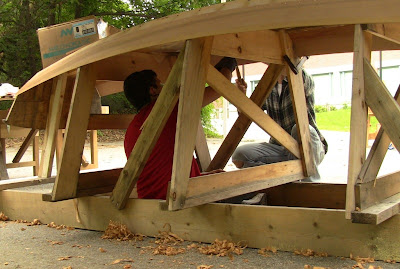
The partially completed boat had sat outside all year under a tarp, but other than some shrinkage in the bottom planks, it was fine. The group spent Monday setting back up and getting the second planks shaped. I came on Tuesday, as they were ready to form the gains in the plank ends. Fitting planks takes several people to hold them in place as they are clamped down and marked.


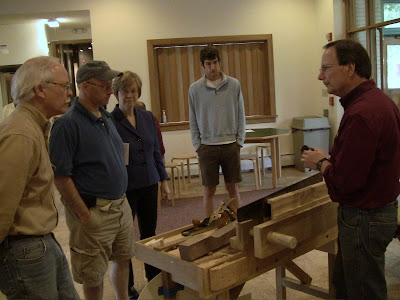
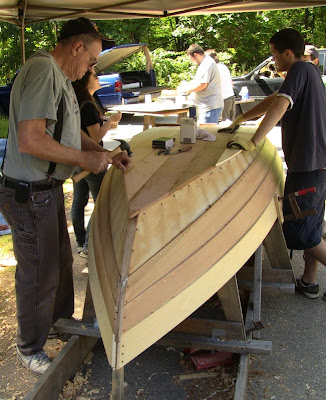
Mr. Smith, the group's teacher, setting the starboard #2 plank in place as Jared points out something on the bottom, and Rick and Chris hold the port #2 plank. Nik (behind Mr. Smith) and Devin are standing in the background ready to hold the starboard plank.


Chris marking the position of the gain. This is a short rabbet that starts as a half-lap at the end and tapers off to zero depth over a foot or so. The mating plank will have a matched gain.


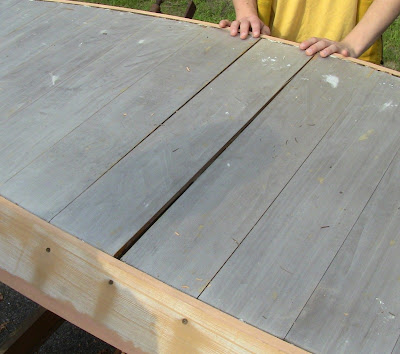
The shrinkage in the bottom planks. Mr. Smith said he would route the opening larger, then fit in a patch from the inside. This crossplanking will have longitudinal planks epoxied onto the outside.


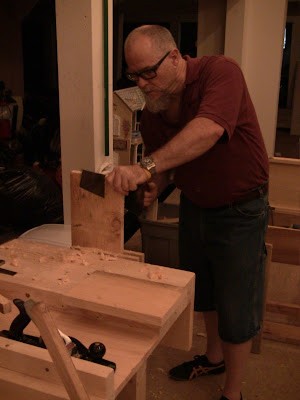
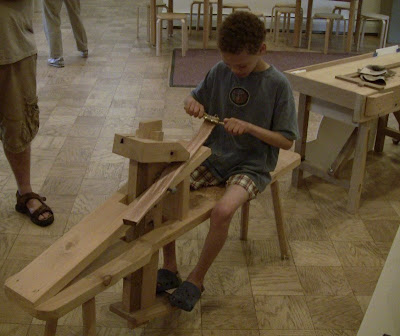
Rick forming the gain with a bullnose rabbet plane.


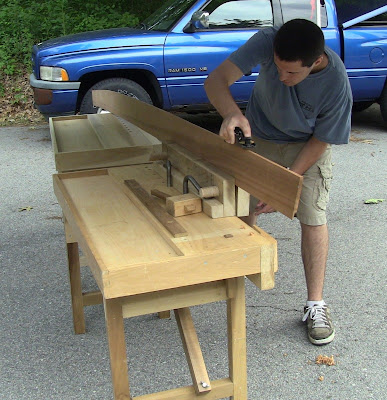
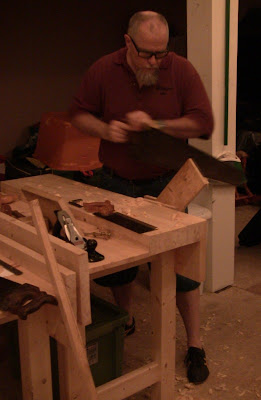
Chris planing the plank down to the final line, lofted on with a batten after taking marks from the station frames.

As you can see in the photo above, once again I find that my portable workbenches with Gramercy Tools holdfasts and Moxon vise make a versatile setup.

Once the final shaping and gains were done, as well as beveling the edge of the garboards, they clamped the planks in place, marked a line on each, and stepped off nail positions with a compass. They drilled pilot holes, then inserted copper cut nails. The nails are secured by clinching inside the boat against a bucking iron.


Driving in the nails.


Lots of nails!


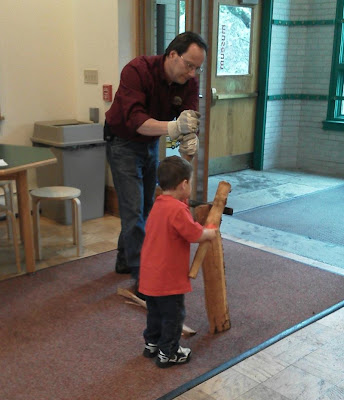
Devin holds a piece of iron bar against a nail as a bucking iron while Nik hammers the head. This clinches the nail point over for a secure hold.


Nik hammering while Devin holds the iron.


Jared and Mr. Smith clinching more nails.

This is all pretty time-consuming, especially for people who haven't done it before. It was great to watch Rick and Chris working. Their experience handling the tools last year showed. They could simply be told what needed to be done, and they did it with no further guidance.

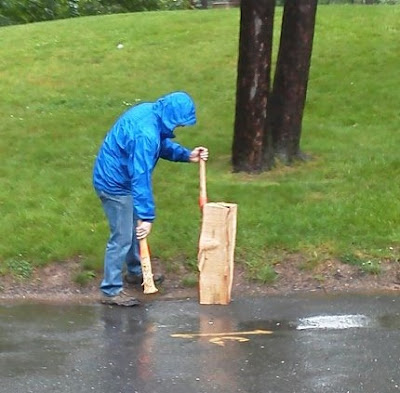
When I got there Wednesday, Mr. Smith made the painful decision to cancel for the day due to rain. Even though we had portable canopies, he didn't want to attach side planks in the wet weather and risk having them shrink and split the way the bottom planks had.


View of the stem with the #2 planks in place.

I wasn't there Thursay or Friday, but I stopped by when I picked up Shelby at the end of the last day. They had made tremendous progress. The remaining two planks were in place on each side, and all but the last longitudinal bottom plank had been laid. Gustav had joined them from last year, along with Chris' grandfather.


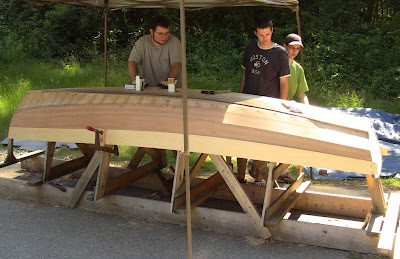
Now that looks like a boat!


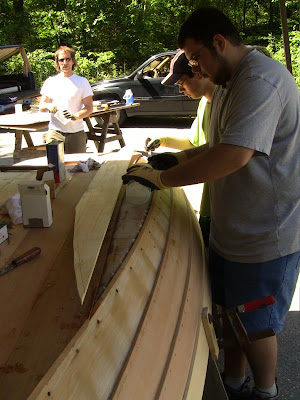
Chris reads the warnings on the denatured alcohol as Gustav and Chris' grandfather look on. They used this to clean up uncured epoxy squeeze-out. The outer bottom planks will be trimmed flush to the sides.

The little nugget of knowledge I contributed was explaining what was meant by "denatured" alcohol, something I only learned recently. Denaturing is the process of adding poisonous additives to alcohol to render it unfit for human consumption. So DON'T DRINK IT!

Ethanol, aka ethyl alcohol, has many uses as a solvent, but in its unadulterated form it is the alcohol in alcoholic drinks. In order to allow it to be sold cheaply for industrial use without coming in conflict with taxable beverage alcohol, the poisonous additives are put in to keep people from drinking it. Unfortunately, I think the message about what has been done to it has been lost over time. So DON'T DRINK IT!


View of the stern quarter.


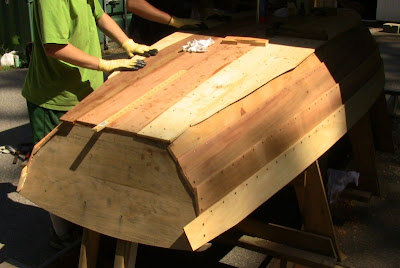
Chris' grandfather finishes nailing a plank while Gustav and Mr. Smith mix the epoxy for the last plank in the background.


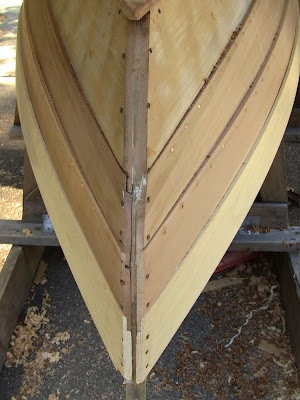
Closeup of the stem joints. Note how the opposing gains form half-laps at the ends.


Gustav pours epoxy for the last plank as Rick follows behind spreading it. As with any glue-up, epoxy time is a bit anxious, because everything has to smoothed into place before it sets up.


Closeup of the stern starboard ends. These will be trimmed flush with the transom.

Mr. Smith said he may do a little work on it over the summer, and may save the interior fitting out for a third endersession. There's still plenty of work to do once the boat is removed from the station molds, it just requires a slightly different set of building skills. Given the pace of work with novice hands, that and sealing and painting should fill a week. Maybe they'll be able to float it on the little pond behind the tent at next year's graduation!

Thursday, June 14, 2012

CGSW Class: Rough Stock Preparation

Last night I taught a class on rough stock preparation at the Close Grain School of Woodworking. The student was Brian Simmons, a former coworker who has a beautiful small farm in nearby southern New Hampshire. The class is about how to make small wood out of big wood, breaking down boards into rough dimensions with handsaws and planes.

Brian has some experience as a carpenter, and had been planning on putting together a home power tool shop. However, he told me he has property where he wants to build a shop off the grid, so he decided to give hand tools a try.


Having crosscut a board into short lengths, Brian rips a section down in the vise.

I went over the tools and workspace options, then had him make a variety of cuts in a 4'-long board of rough milled pine. First I had him rip a 1" strip from the full-length board; I always start with this, because people think a long accurate rip is impossibly hard. In the process I had him deliberately go off course so he could see how to correct it. Since this leaves a rough and bumpy cut, the next thing I had him do was restore a straight reference edge with handplanes.

One of my main points here is to work to the tolerance you're currently comfortable with. If you need a 1/2" safety margin from your line to allow room for mistakes, take it. As you get better, you'll be able to get closer. At this stage of a project, speed is more important than accuracy. Rough, ugly cuts can be cleaned up quickly.

The other points are to use the tools that takes the biggest bite first (meaning your biggest, fastest saws), and to reduce the stock with easier cuts first before doing the more difficult cuts, as the cutting plan allows, so that you minimize the size of the pieces to be cut. Generally, that means crosscuts first, followed by rip cuts, followed by resaw cuts.

Crosscuts are easier than rips because they're typically shorter. Resawing is by far the most laborious, so you want the pieces to be as small as possible. With handplanes, cleaning up long-grain edges is easy, cleaning up end grain is harder.

I had him cut the board into progressively smaller pieces until they would no longer fit on the saw bench. Remaining cuts are done in the vise or on the bench hook. I also had him try the smaller panel saws, as well as hogging off excess width with a scrub plane.

The last exercise was resawing. I demonstrated with a scrap, then had him resaw one of his pieces into two equal thicknesses.


Brian resawing a piece into two thinner panels.

He was surprised at how easily the saws cut. Most people don't realize what a sharp, well-tuned saw can do. Of course, working in pine is easy, but people always assume that handsawing is horribly laborious. Sure, some cuts will work up a sweat, but in actuality, it's quite fun and satisfying.

After he had gone through the various cuts a couple times, we still had some time left, so I went over the basics of sharpening and setting saw teeth. A freshly sharpened and waxed saw is a high-performance instrument.

The next class in the series will be final stock preparation, using handplanes and finer saws to dimension the rough cut parts precisely (meaning to 1/64" tolerances). If you're interested in taking a class, you can sign up for one of the pre-scheduled group classes, or schedule a private class.

Sunday, June 3, 2012

CHS Traditional Craft Day


How much stuff does it take to do a demo? My van after picking up Freddy.

Yesterday Freddy Roman, Micky Callahan, and I participated in the Traditional Craft Day demonstrations at Connecticut Historical Society, where the current SAPFM exhibit A Tradition of Craft runs until September 8. Unfortunately, it rained all day, so they had to cancel the blacksmith demonstration, and we setup in their indoor activity area.

When mounting any military operation, the decision must be made whether to go in light or go in heavy. I've always been a go-in-heavy kind of guy. I would rather have too much stuff than find I wished I had brought something.

I brought two portable workbenches, Moxon vise, shaving horse, a quarter section of recently-felled oak log, portable toolbox, carving vise, portable sharpening station, sawbench and horse, finished Queen Anne foot stool, and a bin of assorted stuff like demo wood, clamps, shooting board, saw sharpening vise, and first aid kit.

Freddy brought his bench-raiser, some legs to be inlaid, inlay supplies, a toolbag, and a side table in-progress. We were loaded for bear.

I brought the log and shaving horse to demonstrate green woodworking techniques because the exhibition included several Windsor chairs. I could let people try working the wood this way, then send them upstairs to look at Nick Kotula's yellow-painted chair. I like to point out that this is at least 500-year-old technology, just with some modern incarnations of the tools.

The log came from a friend's yard in Duxbury, MA, next to Peter Follansbee's hometown of Kingston, which I thought was fitting. It wasn't the ideal stock to work with due to some knots, but it served well enough for demonstration purposes.

I also demonstrated making cabriole legs for another stool, but only got as far as roughing out two sides of one leg blank.


Splitting the quarter log section with a froe out in the parking lot in the rain. I further split these down into sixteenths, suitable for visitors to rive into sample chair parts. The two tree trunks in the background made a good riving brake. Photo by Freddy Roman.

A steady stream of visitors came in throughout the day. A number of them were families with young kids. I love getting the kids involved, because everyone thinks they can't do it, including them.

Several of the parents and staff had some concerned looks on their faces as the kids handled tools and set them down none too gently, obviously worried about safety and damage. I limited the kids primarily to handling the spokeshave, since I consider that one of the safest edge tools, lightweight with limited edge exposure. I let a couple try the drawknife after watching them work and warning them to hold it only by the handles.

After 9 years as a Boy Scout adult leader, I'm used to giving kids freedom to explore while keeping a close eye out for safety. In Scouts we would teach 11-year-olds to handle axe and saw, knife and match safely. We would take them swimming, boating, and climbing, as well as camping in the dead of New England winter. At Scout Camp they teach them how to handle bow and arrow, rifle, and shotgun safely. 

The world is full of risks and dangerous things and ways to get hurt, and I think it's important to teach kids how to interact with them safely. Teach them proper skills and give them opportunities to put that knowledge to use. Like the "trust but verify" of nuclear detente, trust but supervise.


One of the first visitors of the day, Doran Shenk, taking oak curls with a spokeshave on the shaving horse.

Some of the kids were too small to reach the pedal of the shaving horse, so I stood next to it with my foot on the pedal as I guided their hands. I also had a number of them rive wood off the oak splits with the froe and maul. That was a big hit! How often do kids go to a museum where someone tells them "Harder, harder, hit it harder!"


Riving off the sapwood after having riven off the pith. Photo by Freddy Roman.


This young gentleman didn't want to try it at first, but after seeing his friends have fun with it, he gave it a try. Pretty quickly he was smiling and didn't want to stop. You can see a walnut cabriole leg blank in the Moxon vise on my bench behind him.


Showing some visitors how to sharpen a saw and set the teeth, after explaining the difference between rip and crosscut. Photo by Stan Tetrault.

My last visitor of the day was a boy named Joel, who was fascinated by it all. I expect to see his woodworking website in a few years. After trying the spokeshave and drawknife, I pulled my toolbox over for him to stand on so he could try out all my planes as I explained the different function of each. Then he wanted to try the brace and bit. His mother said they have some old tools around the house, but they need to be cleaned up.


Joel learning how the lead screw pulls the bit through the wood without needing to apply any pressure. He's using a Spofford brace made in Bridgeport, CT less than a decade after the Civil War. 

My apologies to Freddy and Mickey, I meant to get photos of them at work but never got a chance to. The final tally on visitors was 178, which the museum staff said was excellent for a Saturday.