Thursday, February 28, 2013

NWA Showcase, Saratoga Springs, NY


A piece of walnut squared up to precise dimensions with handplanes.

Hot on the heels of teaching free classes at the New England Home Show this past week, a new opportunity has come up. I'll be a "featured demonstrator" at the Northeastern Woodworkers Association's 22nd Annual Woodworker's Showcase in Saratoga Springs, NY, March 23-24.

Rob Porcaro, author of the Heartwood blog, had been scheduled to demonstrate, but he had to cancel, and very kindly suggested my name as a replacement to the organizers. Thanks for thinking of me, Rob!

This is a big show featuring exhibits by professional and amateur woodworkers, demos and presentations, paid classes, and vendors.

Lie-Nielsen will be having one of their Hand Tool Events. Tico Vogt and Matt Bickford, who I know from past Hand Tool Events, will be there. Garrett Hack, one of my favorite woodworkers, will be teaching a class. Plus many more.

People have been telling me about this show for a while, so I'm thrilled to be a part of it. I'll be doing two hand tool demonstrations each day, one on basic skills, one on advanced skills. Chips will fly and audience participation is encouraged.


Four cabriole legs in various stages of completion.

The basic demo will be precision stock preparation with handplanes. I'll show how to take a piece of rough stock to precise width, thickness, and length using scrub plane, jack plane, jointer, and smoother, with assistance from a shooting board, the precision secret weapon of hand tool woodworking. I'll cover the differences between the planes, their setup, and their use.

The advanced demo will be making cabriole legs using only hand tools. I'll show several different methods for roughing out the shape starting from squared up blanks, depending on the tools you have available, then the methods to refine the shape to the final graceful compound curves.

I hope to see you there!

Monday, February 25, 2013

The Furniture Project, Day 4


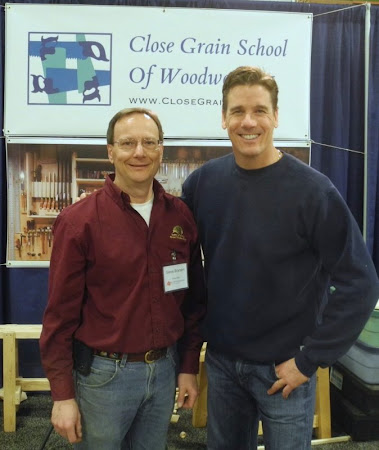
Tommy Mac stopped by to say hello. Photo by Roger Myers.

(Go back to Day 3)

The last day of The Furniture Project at the New England Home Show was pretty busy again, despite the rainy snowy mix outside. I didn't have anyone pre-registered for my classes, so I ran the day as an open demo, demonstrating things as people stopped to watch and talk.

While Tommy MacDonald, star of the PBS show Rough Cut, wasn't officially affiliated with the event this year, I really have to thank him. He was the one who got it going three years ago and opened it up to the rest of us.

I spoke to dozens of people about class schedules and topics over the four days, and handed out over a hundred business cards. I expect to have my schedule for this year posted in the next couple of weeks, so keep an eye here for that.

In the meantime, you can see what I offered last year; this year's group classes will be the same, just different dates. And of course you always have the option of private classes or classes at your location.

I've also started teaching classes at the Boston Woodcraft store. I have a mortise and tenon class scheduled there March 9.


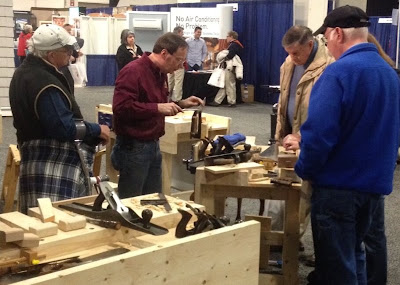
Demonstrating saw sharpening to several onlookers. Photo by The Furniture Project.

Fellow Furniture Project exhibitor David Yepez brought in a saw from out in his truck that he had bought at Roy Underhill's school for a quick lesson. He's an experienced edge sharpener but not an experienced saw sharpener.

It was lightly fleamed, so I showed him the process for sharpening a crosscut saw, and he took it from there. He put a higher fleam angle on it just to see what it would be like.

After quickly scribbling on each side with a block of wax, he was very happy with the improvement in cutting speed. But it was rougher than he liked; he said he had noticed before how a freshly sharpened saw took some use to smooth it out.

I stoned it with just a few light passes of a coarse India slipstone along each side to clean the burr off the teeth, and that did the trick. It cut fast and smooth.


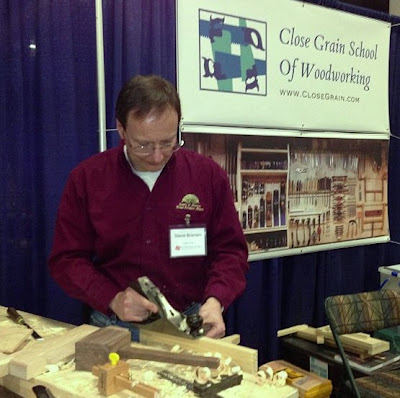
Planing an edge with a smoother. Photo by Scott Oja.

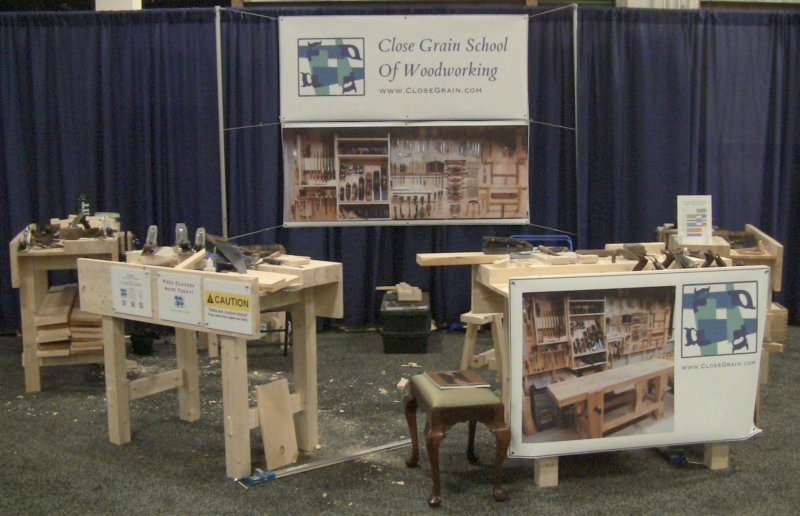
I got a lot of comments on the tool wall photo on my banner. People really like that picture, between the array of tools on display and their organization. Several even took pictures of it.


This is the photo on my banner that everyone loved.

One of the tricky parts about shows and demos is deciding what to bring. Sometimes you have to improvise. Roger Myers was back demonstrating stringing inlay, and found that the bench he was using was just a little too low for his comfort.

He has a really nice bench raiser with Benchrafted Moxon vise and tail vise, but it's fairly heavy, so he didn't bring it. He said he just needed a little elevation, so I took 30 seconds to screw a scrap from the sawing classes to the edges of a couple pieces of 2x4 with drywall screws.

It worked so well for him that at the end of the day he said I had to include it on the blog. Now that the show is over it's for sale for $100, shipping included.


Roger using my supah-dupah bench raiser for his inlay work.


Tommy showing off some of Roger's work.

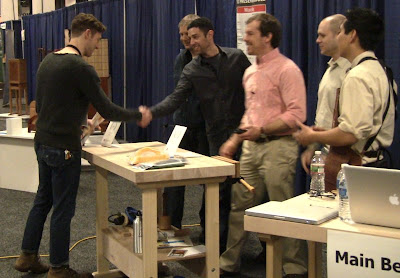
The Furniture Project organizers handed out several awards for the pieces on display. Nils Berg took home two awards, Best In Show and Most Creative.

One of my goals was to get photos of all the work on exhibit and post links for all the furniture makers. They're all current or aspiring professionals producing excellent work, so if you're interested in custom furniture, consider contacting them. Many have portfolios on their websites if you want to see more of their work.

I didn't quite get everybody. I know that I missed at least Rob Bois, and possibly some of the North Bennet St. School students. I'll update this post as I get their names.


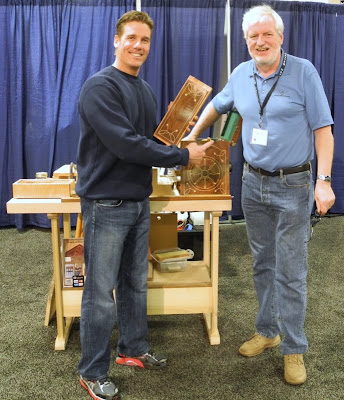
Nils Berg receives Best In Show from organizers Scott Oja, Justin DiPalma, Eli Cleveland, and Rick Waters, with Bruce Wang watching.


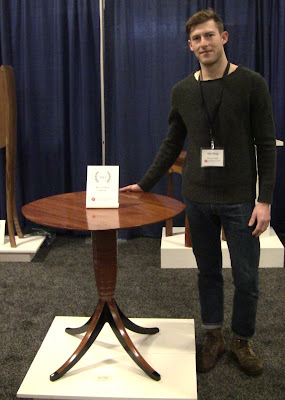
Nils with his Best In Show table...


...and his Most Creative cabinet-on-stand.


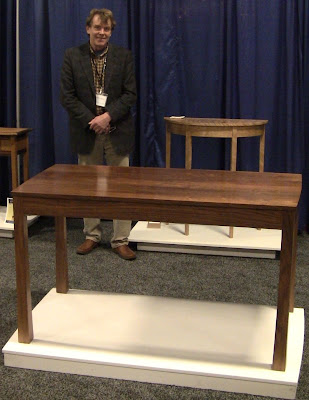
Lars Larsen with his writing table and demilune table.

Lars builds beautiful contemporary furniture. He showed me the drawers fitted into the ends of his writing table, and they were like fine furniture on their own.


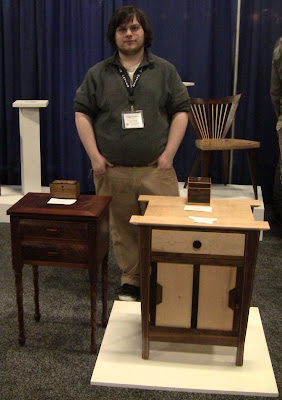
Mike Fossey with his work from the Furniture Institute of Massachusetts.


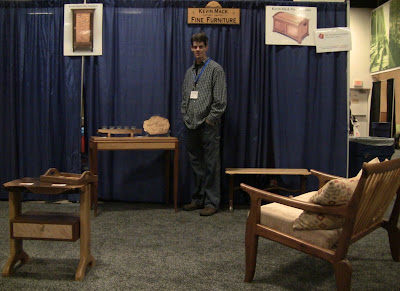
Kevin Mack with tables and seating.

Kevin was a previous winner of Best In Show in Providence, RI.


Sean McKenzie and his "Voting Booth" cabinet-on-stand, winner of Best Interpretive Category.

I told Sean it looked the booth would snag your hand on the barbed edges if you tried to reach in for the ballots. He said someone else had the same idea; his concept is that the electoral process is tearing itself apart.


Glen Guarino with his table.

Glen is a master of sculptural shaping in his furniture.


Matthew Mullen's beautiful cabinet-on-stand took the People's Choice Award.

In addition to his cabinet, Matthew had a contemporary side table and also sold a chair at the show.


Alta Tarla with her music stand.


Gus Lammers and Evan Court with Gus' demilune table. Alta's breadbox is on top.

Gus' table won Best In Show Student at the Providence Fine Furnishings Shows.


Zach Dillinger with his William and Mary spice chest.

Zach's spice chest will be the cover story in an upcoming issue of Popular Woodworking Magazine.


Richard Townsend with his New Windsor chair and side table.

In addition to building new furniture, Richard does furniture restoration.


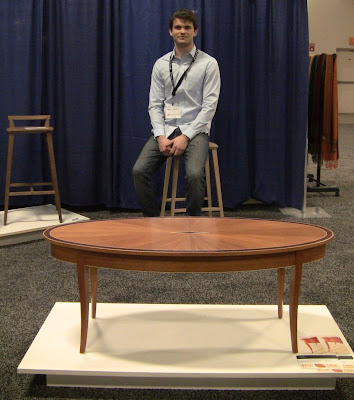
Peter Coolican with his Ellipse Table and stools.

Peter's elegant table is beautifully veneered, featuring a radial veneer match on the top.


Chris Boule with his quilted maple veneered mahogany highboy, winner of Best Craftsmanship.

The quilted maple on Chris' highboy was stunning, dramatically contrasting with the mahogany. The legs have tiny ball and claw feet and knees like the carapace of a crustacean.


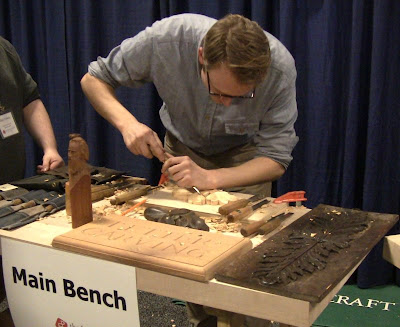
Sten Havumaki demonstrating a leaf carving.

Sten's carvings were fantastic, with exquisite 3-dimensional details. He made it look so easy.

I didn't get much chance to get around to the rest of the show, but there were a couple of exhibitors I wanted to mention.

The first one was the Eastern Massachusetts chapter of NARI, the National Association of the Remodeling Industry. Gary, one of the gentlemen manning their booth, stopped by a couple times to watch and chat (he's one of several construction professionals who have expressed interest in my classes recently).

He mentioned that he was just there to educate the public, not sell anything, and I thought his message was worth getting out. NARI provides a certification process for remodeling contractors. Their focus is on professional conduct, continuing education and training, and fair and ethical treatment to protect homeowners.


Stephen Doucet, president of the Eastern Massachusetts chapter of NARI.

The second was Commonwealth Quality, a brand designed by the Massachusetts Department of Agricultural Resources to identify locally sourced products that are grown, harvested and processed in Massachusetts, using practices that are safe, sustainable and don’t harm the environment. I'm a big proponent of supporting local businesses.

The booth at the show emphasized wood products from participants Specialty Wood Products, Gurney's Sawmill, Berkshire Hardwoods, Copper Beech Millwork, Forestry Works, Hall Tavern Farm, Heyes Forest Products, Lashway Lumber, Ponders Hollow, Roberts Brothers Lumber, and W.R. Robinson Lumber.


Fred Jajko of Specialty Wood Products manning the Commonwealth Quality booth.

Once the show closed, I spent an hour and a half dismounting the vises, disassembling the breakdown bench, and packing up with the help of the other Furniture Project participants. I was beat after 4 days on my feet, but I had a blast!

A friend of mine who's done a number of trade shows told me it's not the business you do at the show that really counts, it's the residuals that come in weeks, months, even years later as people follow up or remember you. If you put in the effort to get out and engage people, you start the business pipeline.

Sunday, February 24, 2013

The Furniture Project, Day 3


Four students busy marking and sawing on the sawbenches.

(Go back to Day 2)

Saturday at The Furniture Project at the New England Home Show was as busy as expected. People were lined up out the door when I arrived just before opening, and they didn't stop coming until closing time.

There were 4 students, Herv Peairs and his wife Margy, Andy McKenzie, and Alain LeBlanc. Several other people who had contacted me also came by throughout the day to watch and talk and play with the tools.

I'm dubbing this Wives' Day, with thanks to three patient wives. This was a long day, handsaw class starting at 11AM, chisel class finishing at 7:30PM. It started with Alain's wife, Yvonne, who signed him up as a gift to him. She perused the show and sat with her knitting until they had to leave at 5. Then Andy's wife spent the whole time at the show, and Margy participated in the whole thing.


Alain finishing a cut with a backsaw as Andy marks a V-notch guideline with a chisel.


Margy and Herv sawing on the bench hooks.


Alain and Andy jointing edges.


Margy thicknessing a board using a #5 with an iron cambered to an 8" radius.


Herv shooting end grain on the shooting board.

I didn't get any photos of the chisel session, but it was almost comical as I kept saying, "And let me show just one more thing you can use it for." The versatile chisel! I showed them how to do carving and shaping bevel up and bevel down, dadoes, edge and end grain rabbets, mortises, chopping, and paring.

Regarding safety, I told them the chisel is the hand tool that can cause the most serious injury, so it's important to always follow the safe handling procedure. This consists of ensuring that no part of your body, your hand, your fingers is ever in front of the edge, and you always push it away from you.

Even if your finger is wrapped around the side of the workpiece where it appears to be safe, it's not. The chisel may slip and go in an unexpected direction, and you can zip your finger wide open instantly, severing skin, muscle, nerve, tendon, and possibly even bone. You can render a finger or hand permanently unusable.

Students and visitors all loved the Paul Sellers workbenches. I had Paul's book out for people to flip through. His method of using an aluminum bar clamp stuffed with wood and clamped in the vise as a planing stop worked well. I do need to add dogs to the benches to use with the vises.

Many people asked where they could get the Gramercy Tools holdfasts. I told them to get at least 2; I have 6 at home for my main bench and bench-on-bench, in addition to the 4 for these benches (and in fact I need to get 4 more so each bench will have 2).

I did two sharpening demos, one somewhat impromptu. I always preface them by saying that if you want to start a fistfight between woodworkers, just bring up sharpening. I say that I'm going to show a way, there are many others, and it's a matter of personal preference whether you like it or hate it, but most of the concepts are common to the various methods.

For the record, I sharpened all the planes irons and chisels using the convex bevel method on oilstones,  and that's what I demonstrated. Paul Sellers uses this method on diamond plates. So you may commence cheering me or hating me. Given 20 blades to prepare for the show, this was fast and effective.

With the backs well-prepared to a mirror polish at the end (I used Chris Gochnour's method from the Aril 2013 Fine Woodworking #232; this article is now available online), the chisels left a surface like glass when carving off hunks of pine.

The biggest comment I get on sharpening handsaws is that every handsaw everyone has tried in the past was dull, they just didn't realize it until now. One quick cut with a sharp saw amazes them.


Phil Lowe demonstrating carving a ball-and-claw foot on a cabriole leg.

Phil Lowe, who runs the Furniture Institute of Massachusetts, stopped by to say hello. I had the privilege of helping him out with his booth this past Fall at the Topsfield Fair.


Roger Myers working on inlaid stringing.

Roger is a fellow member of both SAPFM and the Guild of New Hampshire Woodworkers.


Ryan Messier carving a sign. You can see some of his fine chip carvings on the bench.

Ryan does all his letter carving with a simple Murphy knife, which is made in a small workshop three blocks from my house.

(Continue to Day 4)

Saturday, February 23, 2013

The Furniture Project 2013, Day 2


Demonstrating jointing an edge for passers-by during a break between classes. Photo by Cat Branam.

(Go back to Day 1)

The second day of The Furniture Project at the New England Home Show was quite a bit busier. I had one gentleman, Kevin Wilkinson, who had signed up for the whole day, and a couple of other people who signed up during the day.

A number of people picked up cards and asked about the school and class schedules. For exhibitors at shows like this, woodworkers and others, it's all about the percentages. Engage a large number of people, some small percentage of whom will follow up. If 1 in 10 people who talked to me take a class, I'll have a good busy schedule this year.


Kevin Wilkinson ripping a long strip from a board.


Jim Parker practicing cross cuts.


Connie Leathers resawing the long piece she had ripped from a board.

I always have people rip a long strip off a board, because no one thinks they can do it, worrying about holding to a line. I have them practice taking it off course, then steering it back, like steering a car along a gently curving road.

Connie said she has difficulty with accuracy. My response is that that there are operations that require accuracy, and those that don't. The ones that don't will be cleaned up in seconds with handplanes, using the saws and planes as a tag team. For the ones that do, there are steps that help ensure accuracy.

The rest is practice to develop the control. My favorite analogy is learning to play a musical instrument. You don't play Beethoven right off. You practice to learn how to make notes, then how to combine them into music. In the meantime, you make a lot of mistakes, but throughout, your body is learning.

Since this is not a tool show, there aren't a lot of tool sellers. One opposite me on the aisle is the Micro Jig GRR-Ripper push block system, emphasizing safety even when ripping small thin strips for complex decorative laminations.


Bruce Wang demonstrating the GRR-Ripper on a SawStop table saw.

There a number of independent and student exhibitors at The Furniture Project. The schools represented here are some of the ones I refer people to when they ask about more advanced classes than the ones I teach.


Ben Blackmar sharpening his chisels in preparation for dovetailing.

Ben is a student at the North Bennet St. School, one of the finest schools in the country. The school offers long-term and short programs and seminars in various forms of woodworking, jewelry making, bookbinding, locksmithing, and piano and violin making.


Zach Dillinger demonstrating hand-made window sash.

Zach likes to build reproduction pieces that look like they're already a century or two old, following the aesthetic of the day. That means the dovetails look like they were sawed out by a cabinetmaker working for efficiency, not perfection. Many people are surprised to find that actual period furniture was not made with perfectly-fit joinery, even in the finest pieces. He has a lovely little William and Mary chest in the exhibition that looks like it's led a long life, but was built last year.


David Yepez with his whimsical cabinet-on-stand.

David introduced himself yesterday, saying he knew me from the Lie-Nielsen Hand Tool Event at Connecticut Valley School of Woodworking. He works for Lie-Nielsen as show staff and educator.


Steve Skillins with his magnificent high boy.

Steve is a student at Phil Lowe's Furniture Institute of Massachusetts. This is one of his school projects. Phil is one of my true woodworking heroes; he formerly ran the cabinet and furniture making program at North Bennet St. School.

(Continue to Day 3)

Friday, February 22, 2013

The Furniture Project 2013, Day 1


My booth at the New England Home Show, well bannered.

Yesterday was the first day of The Furniture Project at the New England Home Show, where I was teaching free classes on the basics of hand tool woodworking to promote the Close Grain School Of Woodworking.

(Each day's post is linked at the end of the previous post. Skip to day 2, day 3, or day 4.)

Like last year, Thursday was pretty slow until the after-work crowd arrived. Then it tailed off again. Today may be busier, but tomorrow will be mobbed, given that it's a weekend day and a big snowstorm is expected for Saturday night. Sunday is anybody's guess at this point.

The schedule for The Furniture Project lists me at the "Masters Workbench." That may be coming it a bit high to call me a master, especially when Phil Lowe is going to be in the building, but I appreciate the compliment!

I had four Paul Sellers workbenches setup, each equipped with 2 full size saws, 2 joinery saws, 3 handplanes, 2 chisels, sawbench, holdfast, bar clamp, bench hooks, shooting board, mallet, marking knife, marking gauge, and combination square. You can see most everything here.

One person had pre-registered via email for Thursday classes, but he had to cancel. A couple people signed up for sessions during the day, and I ran the rest of it as an open demo.

A number of people stopped to talk for a while and try a few quick things (half of them other exhibitors from the non-woodworking part of the show; like I said, slow day). Many picked up cards and expressed interest in the school.

A surprisingly common question was along the lines of "What do you mean by school?" Specifically they wanted to know about class formats and schedules, since larger schools have full-time and part-time day programs as well as long-term evening and weekend programs.

I always explain that this is a small part-time school, evenings and weekends, all hand tools (in fact, the entire school is on display in my booth). I teach the basics of sharpening, stock preparation, and joinery to get people started; then for more advanced classes they have a number of choices at the other fine schools in the region.

The demos all went well. You can see the process of someone getting engaged, from standing off in the background, to moving in closer to watch, to putting hands to tools, to laughing and smiling and shaking hands as they thank me when they leave.

All the time I invested in tool tuning paid off well, polishing the backs of the chisels and plane irons to a mirror finish, then sharpening. These 50-100 year-old tools performed magnificently. Sure, I was using soft white pine for easy success, but they just left beautiful cut surfaces. I love it when a demo comes together.

One lady from one of the bathroom renovation exhibits told me she liked to build things in her basements, but she used power tools. She was very interested in the hand tool processes and the precision achievable. I sawed a narrow piece at 45 degrees, then shot it on the miter shooting board. Her jaw dropped when she saw the resulting gorgeous glassy surface.

As usual, another popular item was my portable sharpening station. For saw sharpening, I brought an antique Sargent No. 100 saw vise mounted to a length of 2x6. A few old-timers said they remembered those.

Wednesday was setup day. I loaded my van to the gills with the four workbenches (one breaks down to separate top and leg assemblies), auxiliary items, tools, and lumber. I dismounted the vises to make the benches easy to load. I need to build some individual small toolboxes. For now I just transport everything in plastic bins, not very traditional.

After unloading at the Seaport World Trade Center in Boston, I spent half an hour reassembling the fourth bench and remounting the vises. Naturally the battery in my cordless drill died, so I finished driving the screws with Yankee driver and brace and phillips-head bit.


One van, four workbenches.


Fully loaded with workbenches, sawbenches, tools, and lumber.


Side door view.


The contents of my van exploded into the staging room at the Seaport World Trade Center.

The total cost of equipping the school was about $500 and 35 hours of effort per seat. That covers time and materials for workbench, sawbench, bench hooks, shooting board, mallet made from walnut scraps leftover from my Queen Anne foot stool, vise (the single most expensive item), tools, and tool restoration. So all told, I spent about $2000 and 140 hours over the past year to get to this point.

The banners were a last-minute addition. I had been thinking about getting one ever since looking at photos from last year, where the demo areas looked kind of barren in the background. I had heard an ad on the radio for Staples banners on sale for half-price, so when I stopped in to get foam board to make signs, I got information about them.

Monday I went to their instant banner website and made up the school banner with logo, then had it printed for pickup at the store. It was ready that evening, and I was thrilled with the result.

Tuesday morning before work, I made up the other two, using high-resolution photos of my tool wall and shop that I had sitting around. Why did I have high-resolution photos sitting around? That's another interesting story that will come out in the fullness of time.

The photo banners were ready after work, and they came out equally as well as the first. People always love the tool wall. The print manager at Staples said, "I have to ask you, what is this?", so I gave him the 2-minute explanation of my shop, the school, and the show.

Total cost for 3 banners in outdoor vinyl with grommets, about $150. Yeah, that was pretty darn easy.

(Continue to Day 2)

Friday, February 15, 2013

Final Preparation For New England Home Show


Twelve handplanes.

Next week is the New England Home Show, where I'll be conducting free hand tool woodworking classes as part of The Furniture Project. You can get all the details here. There are still open slots each day if you're interested.

This weekend I'm finishing up the final preparation, which means making sure all the tools for four workbenches are cleaned and sharpened. This is something I should have completed this past summer, since these are the tools I've been accumulating for the Close Grain School Of Woodworking.

Update on sharpening: I had 20 antique edge tools to sharpen for the show. My April 2013 issue of Fine Woodworking, #232, arrived just before I started sharpening. It contained an excellent article by Chris Gochnour, "Plane blades and chisels need a flat and polished back", now available on the FW website. I followed this procedure to prepare all the backs. It was surprisingly fast and effective. Then I sharpened all the bevels with the convex bevel method, also fast and effective. The results: sharp edges that left silky-smooth surfaces.


Sixteen handsaws.


Eight chisels and four mallets.


Four sets of accouterments.

Each workbench needs enough tools for the basics of handplanes, handsaws, and chisels. Most of the tools are antiques from 60 to 110 years old.

They were in various conditions when I acquired them, but I've put them all back into working order. I cleaned them up just enough to look good without being too shiny; I like my tools to show their history.

The jack planes were in the worst shape.  I had to derust a couple by electrolysis (doesn't everybody have a car battery charger hooked up to an iron rod in a plastic bin of water and washing soda on their back deck?).

For handplanes, each bench will have a jack plane for roughing (#5), a long plane for flattening and jointing (#6 or #7), and a short plane for smoothing (#3 or #4).

For handsaws, each will have a rip saw and a crosscut saw for rough sawing, plus a backsaw filed crosscut and a smaller one filed rip for fine sawing.

For chisels, each will have a 3/4" or 1" chisel, a 1/2" chisel, and a mallet.

In addition, each will have a square, a chip carving knife for marking, a marking gauge, and a pair of bench hooks.

Not shown, each will have a shooting board, a Gramercy Tools holdfast, an aluminum bar clamp stuffed with a wooden strip for work-holding in the vise, and an auxiliary sawbench.

For lumber, I have 32 four-foot lengths of pine 1x8 from Parlee Lumber (the oldest commercial sawmill in the US, coming up on 200 years!). I got #2 instead of clear, but it's actually almost perfectly clear.

I've spent the last few months building out the various items needed. The workbenches are from Paul Sellers' book, and he told me about the bar clamp rig when I saw him at The Woodworking Show in Springfield last month. I built the sawbenches from Chris Schwarz's design.

I made three walnut mallets based on Michael Cullen's article "Make a mallet" in the Winter 2012 Fine Woodworking (#230), copying my beech mallet. I made two more sets of bench hooks based on the one I made at Roy Underhill's class at Lie-Nielsen.

I'll have plenty of photos from the show to post. Stop by and get your mug on the blog!

(Continue to the posts for each day of the show.)