Making the tenon comes straight from watching Phil Lowe work, which was the original genesis of the four-stroke tenoning exercise. You'll recognize much of this procedure from that exercise.
After marking out the tenon on the end of a rail, saw rough shoulder and cheek cuts 1/16" away from the line. On the coarse-medium-fine scale of operations, these are medium cuts; they don't have to be exact. Then pare with a paring chisel exactly to the line; this is the fine work that gets the joint to a snug slip-fit, properly aligned.
Tenon Layout
The critical measurement on a rail is the distance between the tenon shoulders on the ends. The actual length of each tenon depends on the depth of the mortise it will fit into.
The tenon should not quite bottom out in the mortise. You need to leave some room for glue, otherwise the hydraulic action of the glue will keep it from seating all the way.
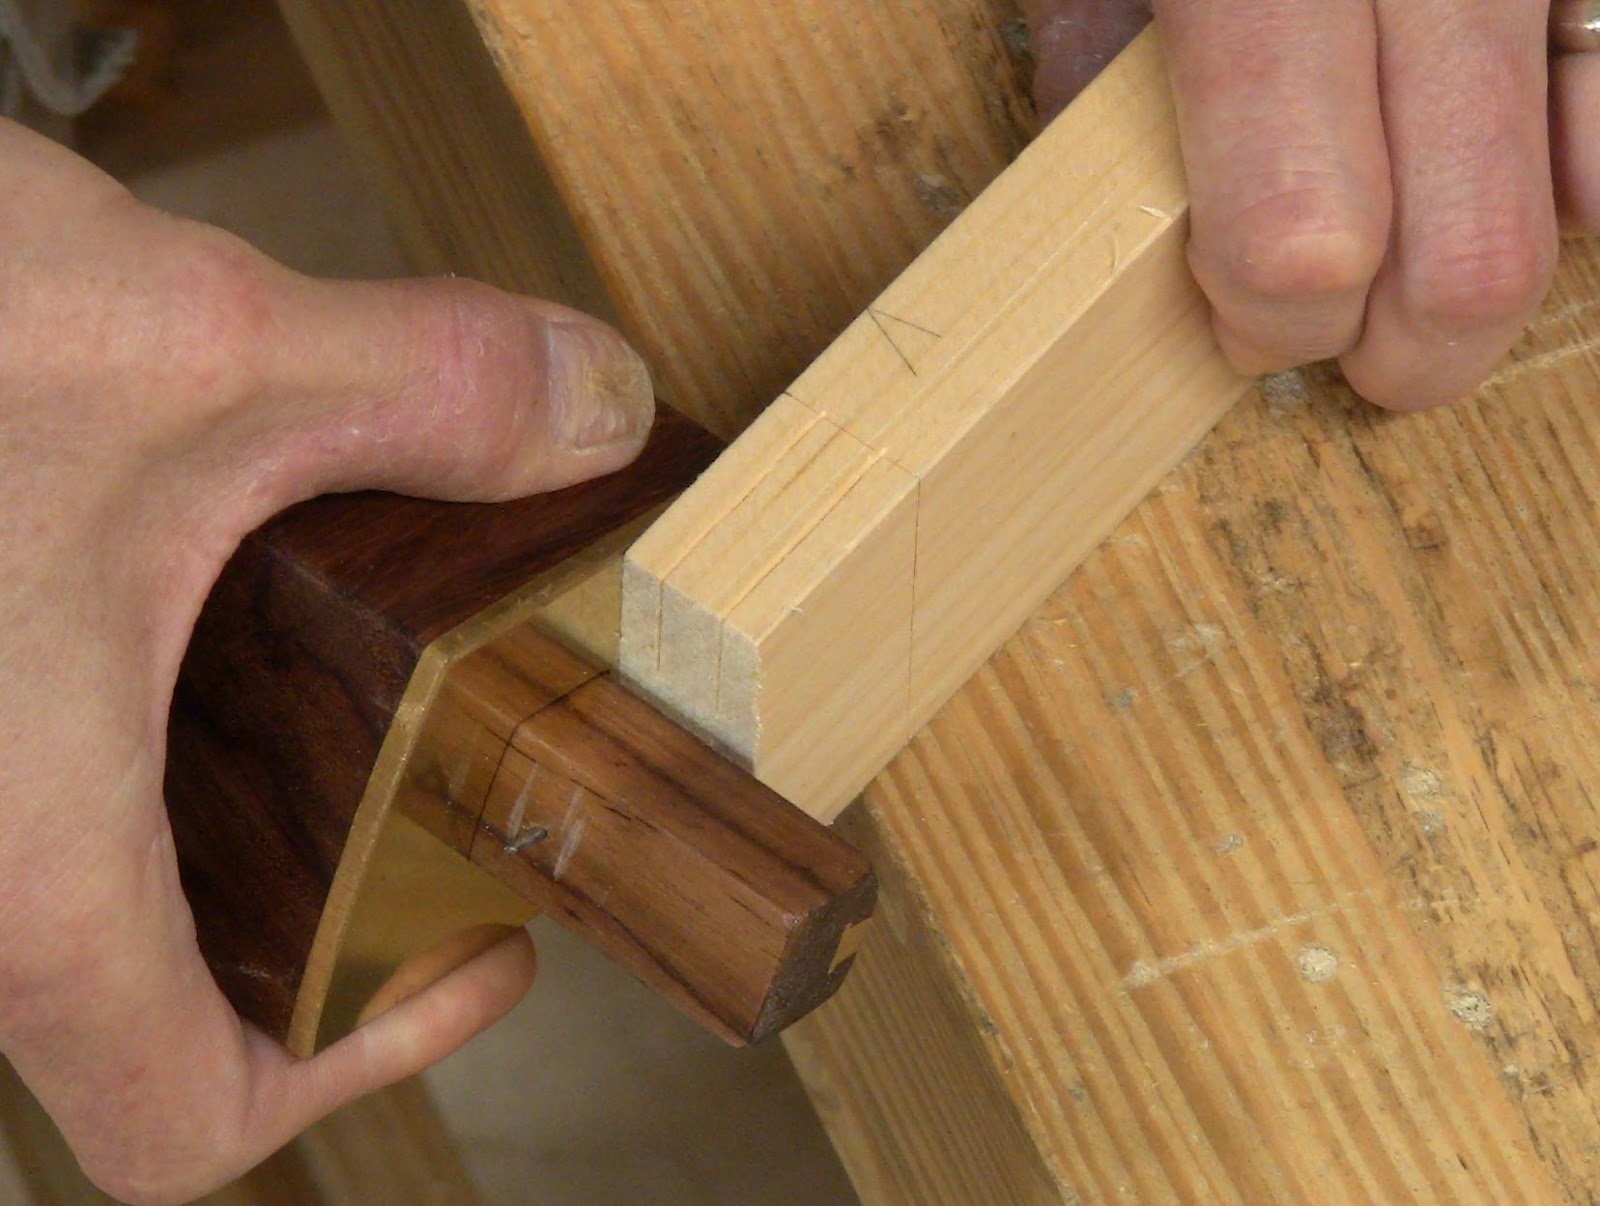
Use a square or ruler as a crude depth gauge; no need for actual numeric measurements. Fit it into the mortise, then transfer this depth to the end of the rail, backing it off by up to 1/8" for glue space. If you've marked measured shoulder lines on your rail, mark the tenon length from this point.

Bottom out the end of the square in the mortise and pinch it to gauge the depth.

Shorten the depth measurement by about 1/8", then mark this on the rail end as the position of the shoulder. If you already have a shoulder measurement marked, mark it from there.
Knife the shoulder line squared all the way around the rail. This needs to be a very careful marking job, because it will determine how well the shoulders of the tenon seat against the stile. The knife line actually forms the surface cut in the wood, establishing a crisp shoulder line.
The key to this is making sure that the body of the square is always held against a marked reference surface, either reference face or reference edge (you did mark your reference face and edge when you squared up this stock, right?). Double check this every time you put square to wood.
Always set the knife in the last line and move the square up to it. That ensures there's no error in the positioning of the square.
Make each line with several light strokes of the knife. If you try to make it in one deep pass, it's easy to knock something astray by using too much force.

Knife the line in several light passes. Note the knife is cutting on the waste side of the line, with the square held against the reference edge.

To continue the line around, place the knife in the previous line, hold the square against the reference face, and slide the square to the knife. On this edge, the reference face is on the far side, away from me.

On this other edge, the reference face is on the near side, so I have to reverse the knife and square.

If you've done everything carefully, the last line will meet up with the first line at the final corner, forming a continuous line all around.
Mark the cheeks using the same gauge setting you used to mark the mortise (you kept that setting, right?). Again, one of the keys to precision is holding the gauge against the reference face of the rail.

Drag the double pins on the gauge back from the corner in several light passes, holding the gauge firmly against the reference face. Don't let the pins get pulled off track by the grain.

On the end grain, mark down from the upper corner...
...and up from the lower corner.

Darken the lines for visibility with a pencil sharpened to a chisel point.
Sawing The Shoulders
Hold the rail in a pair of bench hooks and saw rough shoulder cuts 1/16" away from the knifed shoulder line, just down to the cheek lines, using a crosscut backsaw. Also saw shoulder cuts on the edges, just deep enough to break the surface and leave a kerf for later. These saw cuts don't have to be pretty, so you don't need to make a knife wall for the saw to follow.

Crosscut rough shoulders with a back saw. Here I use the tip of my thumb as a guide to position the saw about 1/16" from the knifed shoulder line.

This is what it should look like after sawing the shoulder on each face, 1/16" from the knife line in the waste. The main thing is not to saw any deeper than the cheek lines, which would weaken the tenon.

Saw the edge shoulders just enough to establish the kerf.
Sawing The Cheeks
Holding the rail angled in the vise, saw rough cheek cuts 1/16" away from the gauged cheek lines, using a rip backsaw. Saw diagonally down one corner on both cheeks, then flip the piece around and saw the other corners diagonally.
Then straighten the rail up in the vise and finish the cuts straight across, removing the cheek waste. Again, these cuts don't have to be pretty, they just have to remove the bulk of the waste.

Saw diagonally down one cheek to the shoulder cut...

...then the other cheek.

Flip the piece and saw down the other corners. Don't worry if the two cuts on each cheek don't meet.

The resulting cuts. Not a particularly pretty job, but it doesn't need to be.

With the rail upright in the vise, saw down the remaining wood in each cheek. You may need to hold the scrap in place to keep it from snapping off. If it does, that probably won't hurt anything. In fact, if the grain is cooperative, you can actually chisel the cheeks off roughly, straight down the end grain.

Saw down the remaining cheek.

The resulting rough cheeks, ready for the four-stroke chisel technique.
Paring The Cheeks
This is where the practice from the four-stroke exercise comes in. This is the fine precision work that will determine how well the joint fits. Go back and do that exercise if you haven't tried it. It also shows how to check the cheek for flatness.
If the tenon is longer than the width of your paring chisel, make one or more crosscuts in the remaining cheek waste down to the cheek lines, dividing the tenon up into lanes that you'll pare independently. You can actually make these cuts when you do the rough shoulder cuts.

First stroke: pare across the cheek to the midpoint, removing half the remaining waste thickness. Observe carefully how the grain responds so you'll know how to handle the final strokes. Note that I've crosscut the tenon into two lanes that are narrower than my chisel; you can just see the cut line.

Second stroke: pare across from the other side to meet the first stroke.

Fourth stroke: after having pared across exactly on the marked line from the other side for the third stroke, paring across on the line to remove the final bit of waste.

First stroke on the opposite cheek, where you can see how much to leave for the final paring. You can also see that I repeated the four-stroke technique on the lower lane of the near cheek.

Second stroke on the opposite cheek.

Third stroke.

Final stroke.
Lay the flat back of the chisel across the cheek and see if there are any high spots. Carefully pare these down even with the rest of it using a skewed sideways sliding cut and pushing the chisel end with your thumb.

Push the skewed chisel sideways with your thumb across any high spots.
Cutting The Tenon To Width
Orient the tenon properly with respect to the mortise and mark its width from the mortise. This fits the tenon exactly to the mortise. Saw down the tenon with a ripsaw to remove this waste. You may need to crosscut it a bit more at the shoulder to meet this cut.

Hold the tenon end up to the mortise and mark the actual width.

Saw down this with a ripsaw. Careful, it goes fast!

Crosscut any last remaining bit to remove the waste.
Paring The Shoulders
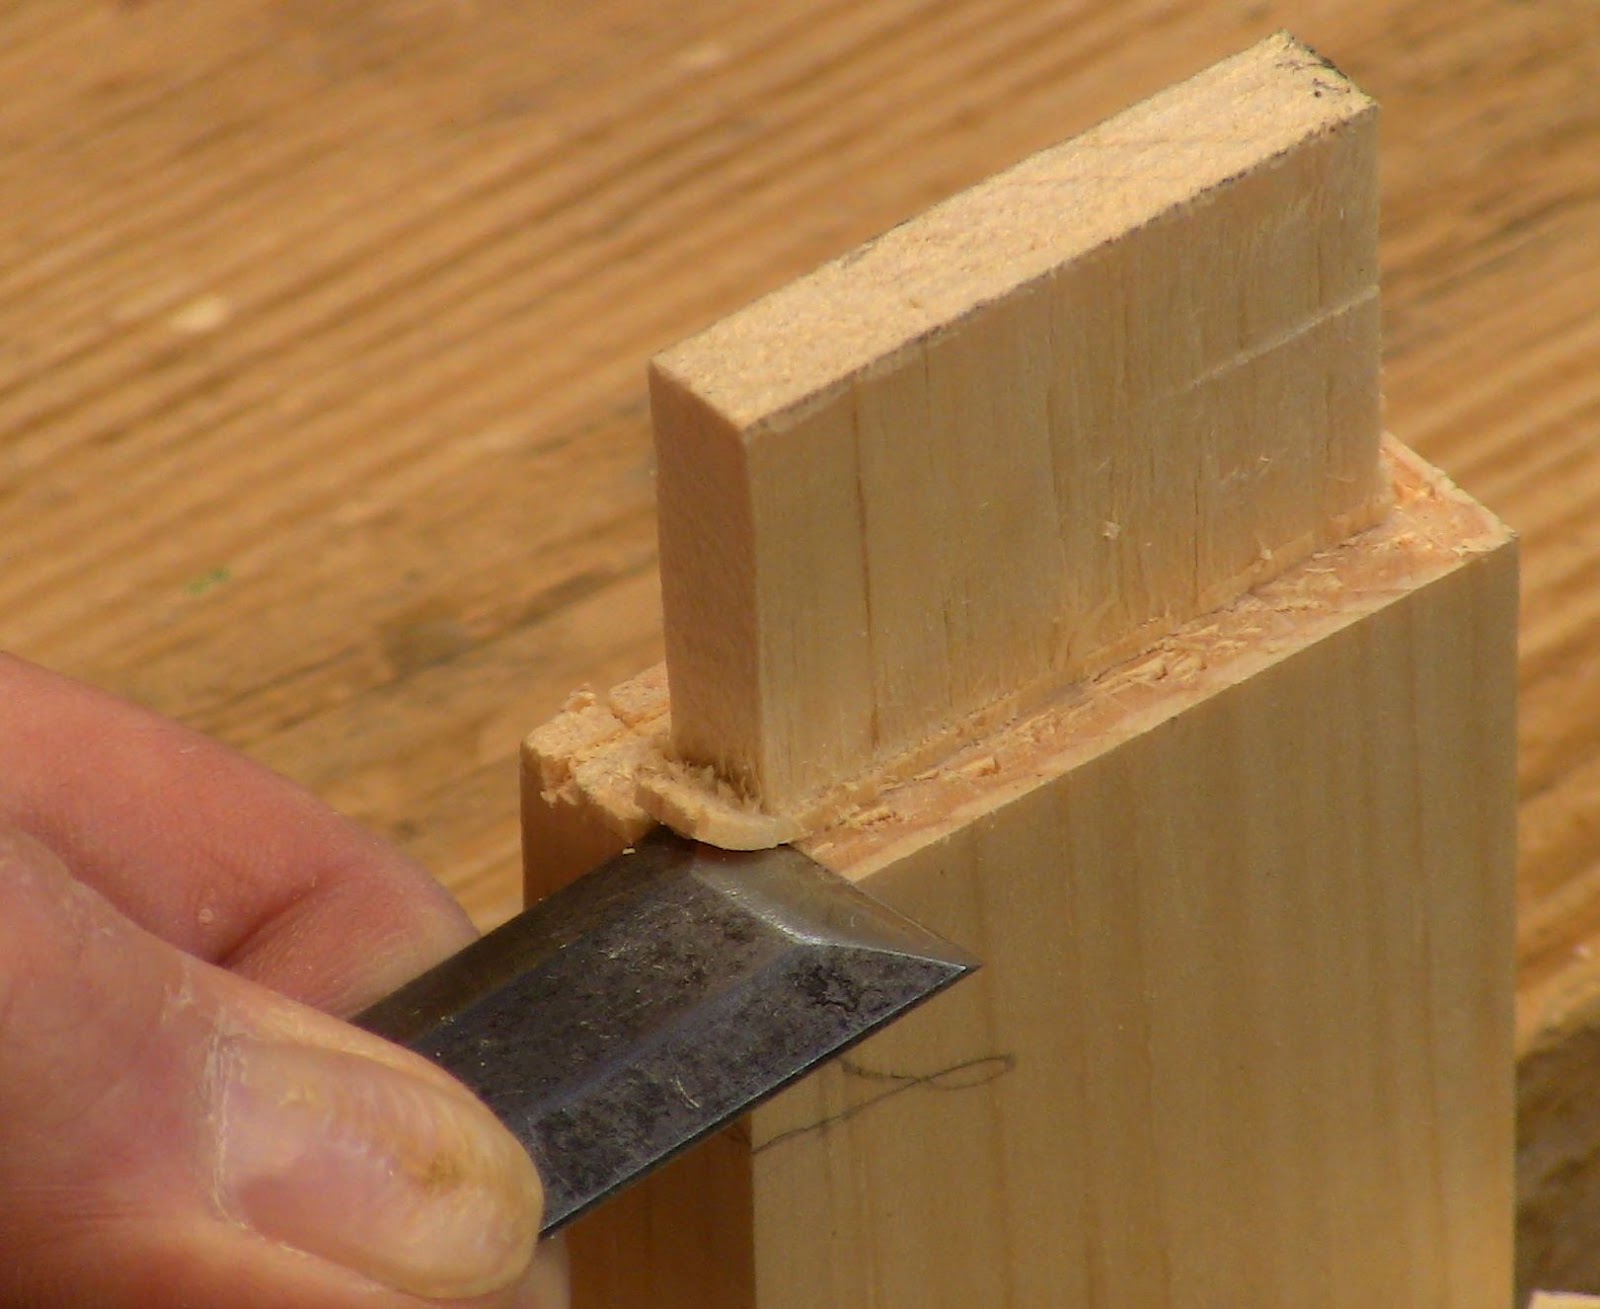
The final trimming is to pare the shoulders down at the knifed shoulder line. This will be very visible and will affect how the rail snugs up against the stile. Remove this waste a little at a time, using the corner of the chisel progressively along the shoulder. If that corner starts to dull, come from the other direction using the other corner.

Set the corner of the chisel in the scribed line and push straight in to cut the shoulder cleanly to the tenon, then flick the bit of waste off. Rest the edge of the chisel on the already-pared shoulder as a reference to keep it flat.
Continue around to the tenon ends.

Turn the piece around in the vise and do the other side.

If there's any junk left in the very corner of the shoulder, clean it out by paring across, then in.
Chamfer The Tenon
Chamfer the end of the tenon so that it slides in smoothly without catching on the mortise walls. This also makes it easy to trim the tenon length if it bottoms out too soon in the mortise.

Angle the chisel and choke up on the end to chamfer the edge with a skewed cut.

Repeat on the opposite edge.

Come in from each end and pop the edge off.

The fully pared and chamfered tenon.

The opposite cheek.
If the tenon bottoms out in the mortise, keeping the shoulder from snugging up, pare across the chamfered end to shorten it. Alternatively, you can deepen the mortise a bit.

Test fit: the shoulder doesn't close up all the way.

Pare across the tenon end from one side...

...then the other, meeting somewhere in the middle.

The slightly shorter tenon.

Test fit: now the joint closes up tight, with no visible gap.
Evaluating Fit
A good fit means that the tenon slips together with hand pressure, and then is snug enough to hold together when you pick it up. It shouldn't be so tight that you have to drive it together with a mallet; that will just split it. It shouldn't be so loose that the rail falls out when you pick up the stile.
Either situation can be corrected, but it's time consuming. A tight tenon can be pared very carefully to fit. A loose tenon can be repaired by gluing a new cheek on, then paring it back down.

When slipped together and held up by the stile, the rail should not slip out.

A snug slip fit.
The other important thing is the joint should be flat. The rail should not be twisted when the stile lies flat, and the rail should lie in the same plane as the stile.
Either of these conditions can be corrected by selective paring, but every little bit you remove loosens the fit.

The rail and stile lying flat in the same plane.
After glue up and the glue has dried, cut the horn off (remember that extra length on the stile?), then carefully plane the end grain in from the corner flush with the rail edge.
This method appears to be time-consuming, but it's not. The sawing is very fast, because it doesn't require that much care. The paring is fast because there's only a small amount of material left to remove. You'll find you can develop a fast, efficient rhythm with a high degree of control to produce consistently snug joints.
Practice this by making a joint, then cut if off and start again. Repeat 10 or 20 times until you've got it down.
If you want to learn to fit a tenon right off the saw, you can still use this method to practice careful sawing. Once you feel you can saw well enough, you can omit the paring step. Either way works, use whichever is most efficient and enjoyable for you.