Sunday, December 13, 2009

My Roubo, part 6

(Go back to part 5)

Whew! 8 mortises. 8 hours. Between work and the Thanksgiving holidays, not a lot of opportunities to work on them. But with perseverance, done.

The mortises are big, which accounts for part of the long time. However, because I didn't have a chisel of the full width, it meant the walls would creep inward as I worked down. This required a lot of cleanup during the fitting stage. On the last one, I tried a slightly different technique, two narrower parallel mortises that left better outer walls. This required less fine cleanup, and was a bit faster overall.


Cleaning up the web left in the middle. This took about 30 seconds.


Finally, a major milestone: the dry fit of the base.

Next, time to bore the holes for the leg vise screw and holdfasts.


Another use for the Schwarz sawbench. I don't have a bit large enough for the vise screw, so I used an adjustable bit. With only one cutting edge and a large diameter, this is fairly hard. See if you can spot the nasty flaw in my alignment guides.


Paring the edge to fit the flared screw flange.

I bored the holdfast holes with a smaller fixed-size bit. This was much easier. After doing the front side of the first two, I noticed my alignment mistake.


The corrected setup. I was referencing the squares edge-on, not face-on. Turning them both 90 degrees gave me the correct sighting references. The carpenter's speed square had a definite sideways lean (the result of dropping it on the floor and flaring the corner of the base, plus it's just not made to be an accurate reference on that axis): after boring from the back side, one of the holes was a good 1/8" off center when it met in the middle. Some cleanup with a gouge and cylindrical surform rasp cleared the through-holes so the holdfast shank would fit.

The final task before assembly: making the oak pegs for the drawbored mortise and tenons. The base requires 2 pegs per tenon, for a total of 16.


Riving out the pegs from some bone dry oak scraps.


Tapering the end of a peg blank to fit the first hole in the dowel plate.


What do you get when you drive a square peg through a round hole? A round peg!


What about when you drive a round peg through a smaller hole? A smaller round peg! The final stage through the plate after going through the previous two holes.

In addition to the one that got away as the end shot through the dowel plate, the ones that were destroyed in the process, and the ones that turned out to have some turning grain (resulting in bowed pegs), this took 2 hours. For someone not used to swinging a hammer repeatedly, it was one of the hardest physical tasks so far. Can you say "repetitive strain injury"? I had to use both hands to hold the hammer for the last few. My forearm throbbed, and my elbow will probably be sore for several days. This is also the time for eye and ear protection, with all the ragged chips flying off the peg and loud pounding (not a good idea while someone's trying to sleep upstairs!).

This is something best spread over the project rather than done all at once. Makes me think of the days of wooden ships and iron men. The shipwrights pegged all the hull planks with "treenails", large oaken pegs. Someone had to make those things by the thousands.

(Continue to part 7)

Tuesday, November 10, 2009

My Roubo, part 5

(Go back to part 4)

Next are the short stretchers. While the long stretchers are bounded by the placement of the legs, with lots of room to choose from, the short stretchers are bounded by the width of the top, minus the width of the legs.


No need to measure the main length, just set the pieces out and mark the shoulder lines where they cross. Then measure for the tenon lengths.

Since my small fine-toothed backsaws didn't do so well on the long stretcher tenons, I moved up to medium size saws. These stiffer blades with larger teeth did a much better job. In this article, Chris Schwarz describes tenon shoulders as a first class cut, meaning make it your best, because it will show. So I marked the shoulders with a chisel and pared a small trough for the saw to ride in. That way I know the cut is exactly on the line, not offset, and not skewed. This is the way to keep your saw from jumping around when starting a cut.


Cutting the shoulders with a medium cross cut saw.


Cutting the cheeks with a medium ripsaw.


Notching the start of the cheek cut with a chisel.


Starting the heavy work: chopping the leg mortises.

The mortises are fairly time-consuming, made more so because they are large and I didn't have a mortising chisel of the full width. This is one of those operations where you get most of the way in 10 or 15 minutes, then spend the next 20 or 30 fine-tuning the last little bit. I'm going for a snug fit, trying to avoid over-trimming. That's the challenge with mortise and tenon. You can pare away to loosen the fit, but you can't add it back to tighten. Well, you can glue in veneer-thin shims if you really blow it.

(Continue to part 6)

Monday, November 9, 2009

My Roubo, part 4

(Go back to part 3)

Time to work on the long stretchers. The front stretcher has an inverted "V" track on the top front edge for the sliding deadman, so I'll sink a molding. First step is to sink a rabbet in the back side of the top to lower the edge.


Using a 1" skew rabbet plane. Since the rabbet is 1 1/4" wide, this takes two sinkings, bringing each one down near a depth of 1/2", then laying the plane on it's side and going the opposite direction to bring it down to the line.

On the first sinking I used the rabbet plane too wide, nearly full width. It got to be heavy going, repeatedly loosening the blade. The second sinking, at only 1/4" wide, was much easier. I should have split it evenly, or maybe even done three sinkings. Multiple easy sinkings are definitely easier than a single heavy one, and probably end up being faster. The glove makes handling a molding plane easier for real work, since each sinking requires a number of strokes with the plane.

Second step is to make the chamfer over the rabbet.


I started with the block plane, until it got down to the point where it was too wide for the blade on this inside corner.


Using the rabbet plane on the spring. This eventually got too wide, again resulting in heavy going for this plane.


Finishing up with the shoulder plane, since it could fit all the way into this corner. This ended up working very well, producing a nice fine ribbon nearly the length of the stretcher. This is the most success I've had with this shoulder plane.


The final profile after chamfering the front edge with the block plane.

After molding the edge, the ends need to be tenoned. I did this with my fine-toothed Lie Nielsen tenon and dovetail backsaws, but these turned out to be inappropriate tools here. The tenons are too big and the wood too soft, resulting in a lot of cleanup work.


The tenoned end.


Cleaning up the cheek with the shoulder plane.


Cleaning up the shoulder.

This operation was the most troublesome for me. I haven't had a lot of success with this small shoulder plane. It makes me lust for one of the big Lie Nielsen shoulder planes that have the mass to carry them through the cut, as well as the size to grip it well without bumping my hands into the wood.

(Continue to part 5)

Sunday, October 25, 2009

Insomnia, Obsession, and Time Management

I love this maple in our back yard. It looks positively electric. One of the last signs before things really start to get cold. But that's not why I'm here today.


You know how it is. You wake up at 3AM with your mind racing, or you find yourself still awake at midnight, wondering why your software crashed and how you'll cut those dovetails. Or maybe you don't. Probably just as well!

As a hobby, woodworking is an obsession. For years I've watched woodworking shows and bought books and magazines, utterly fascinated, driven to do it, but never actually doing much. I never seemed to have the time, or the money, or the place, or the energy.

I always wanted to be able to do whole projects in marathon stints, start to finish. But real life just doesn't permit that. Work and family responsibilities take precedence. Ambitious projects seemed all the more daunting because of the focused time required.

With age has come patience. The drive to do something in one go has subsided. That only led to frustration, which meant I never did anything. Paradoxically, backing off and doing a little at a time has meant I get much more done. So it takes weeks from start to finish. I'm not working to anyone's schedule.


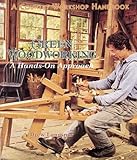
This is one of my first all-hand-tool pieces, a shaving horse from Drew Langsner's Green Woodworking.


One of the first pieces I did on the shaving horse, a rustic garden side-table.

Over the past several years I've worked on individual skills a bit at a time. It's been like my own personal apprenticeship. A lot of shavings and sawdust, yet almost nothing comes out of the shop. But it has allowed me to hone my patience as well as my skills.


These bowls are some of my practice pieces, experimenting with different species in the fresh-cut green state. These are white birch and cherry.

So now those ambitious projects don't seem so daunting. I'll get there, a little bit at a time. It's like shop class in 9th grade. You get your one-hour time slot a few times a week.

If I can spend an hour on the occasional evening, that's enough to make some progress, and maybe it has to be set aside while the glue dries anyway. On weekends, a couple hours at a time is just right, take a break, enjoy some family time, don't wear myself out and get crabby. And if I don't get as far as I wanted to that day, no big deal. It will be there waiting for later.

That way, no matter how crazy the work and family schedule gets, I still get some time in the shop to appease the obsession.

Recommended Books

Saturday, October 24, 2009

My Roubo, part 3

(Go back to part 2)


Cutting the leg timbers in half. I knew I was keeping all those empty kitty litter containers around for something! A stack of them made a fine cutoff support.


Gang chamfering the foot end of the legs.


First method for sawing out the timber-frame-sized tenon cheeks at the top end of the legs.


Second method, since they were short enough. This turned out to be easier, better angle to see the saw exit so I didn't over-cut.


All four legs sized and tenoned, along with the slot in the foot of the leg that will be front left. This is for the leg vise. German bench screw is on order from Woodcraft.


Plowing the groove in the underside of the top for the sliding deadman using a Stanley 45. First time I've used it, so I sharpened up the plow blade with Mike Dunbar's "scary sharp/sensible sharpening" sandpaper system.

A brief digression: Sharpening is a big barrier for people trying to use hand tools; it was for me. It looks time-consuming and troublesome, bringing work to a halt. Dunbar calls it a gateway skill, opening up the hand-tool arena, because hand tools need to be really sharp to be usable. His system just works, no jigs, no messing around, 5-10 minutes to take a tool from flea market condition to razor sharp. Like any hand-tool skill, it takes a little practice, but not much, and you're back to doing what you want to do, working the wood.

To get set up, I ordered one roll each of  PSA sandpaper in 80, 120, and 320 grits, and several 5-sheet packs each of  wet-dry sandpaper in 600, 1000, and 1500 grits from Klingspor. I found tempered plate glass shelf pieces at Home Depot in the shelving section, a 36" piece for my dedicated sharpening station, and a 24" piece for carrying in a yet-to-be-built tool chest. Mike's original video used a 36" glass plate; in later articles he switched to aluminum plates due to the risk of breakage; I've seen people mention using MDF, Corian, and marble, as long as it's flat and stable.


The 45 did a great job, except that the skate left several inches undone at each end, and it bottomed out about 1/8" short of the required 1" depth. So I brought out the chisels and the number 71 router plane, extending its cutter past the normal depth adjustment. It was a little chattery, but worked quite well.


Final chopping at the ends. I didn't have a 5/8" mortising chisel, so I made do with a 3/8".

(Continue to part 4)

Friday, October 23, 2009

My Roubo, part 2

( Go back to part 1)

Next to make the legs. They'll be 5"x5" timbers. Massive.


Marking out width for a leg glue up. I only need to trim off about 1/2".


To rip or to scrub? That is the question. Let's try ripping first.


A 114"-long rip, 1/2" wide. About 1/2" progress per stroke, so roughly 200 strokes.


Crosscutting to the length of 2 legs.


Finishing off. I really need to build another mini Krenov-style stand like the one holding up the far end. Very nice design, mortise and tenon uprights to feet and stretcher, overlapped bridle joints at top. I built it a year ago, still haven't had to glue it up. Chris Schwarz sawbench under my knee.


How much wood would a scrub plane scrub if a scrub plane could scrub wood?


The chips literally fly when scrubbing on the diagonal.


Following the scrub with a transitional jack with aggressively crowned blade. Ripping and scrubbing are about the same amount of manual labor, but the scrub and jack are much more viscerally satisfying.


A long but rough curl. This jack is setup as a fore plane, the blade crowned between a scrub and a try plane, with a big wide mouth. Transitional planes are not just for burning!


One double-length leg glue-up, for 5"x5" finished. About 50 lbs.


Finishing squaring up a leg with a corrugated jack setup for trying, after roughing down with scrub and transitional jack. I'm standing on a 2x10 to get a little elevation over the work.


As Chris Schwarz says, coarse, medium, and fine tools. The squared-up legs ready for cross-cutting in half and trimming to length.

Next will be timber-frame style tenons for fitting to the top.

Continue to part 3