Sunday, October 25, 2009

Insomnia, Obsession, and Time Management

I love this maple in our back yard. It looks positively electric. One of the last signs before things really start to get cold. But that's not why I'm here today.


You know how it is. You wake up at 3AM with your mind racing, or you find yourself still awake at midnight, wondering why your software crashed and how you'll cut those dovetails. Or maybe you don't. Probably just as well!

As a hobby, woodworking is an obsession. For years I've watched woodworking shows and bought books and magazines, utterly fascinated, driven to do it, but never actually doing much. I never seemed to have the time, or the money, or the place, or the energy.

I always wanted to be able to do whole projects in marathon stints, start to finish. But real life just doesn't permit that. Work and family responsibilities take precedence. Ambitious projects seemed all the more daunting because of the focused time required.

With age has come patience. The drive to do something in one go has subsided. That only led to frustration, which meant I never did anything. Paradoxically, backing off and doing a little at a time has meant I get much more done. So it takes weeks from start to finish. I'm not working to anyone's schedule.


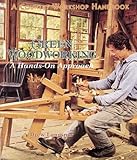
This is one of my first all-hand-tool pieces, a shaving horse from Drew Langsner's Green Woodworking.


One of the first pieces I did on the shaving horse, a rustic garden side-table.

Over the past several years I've worked on individual skills a bit at a time. It's been like my own personal apprenticeship. A lot of shavings and sawdust, yet almost nothing comes out of the shop. But it has allowed me to hone my patience as well as my skills.


These bowls are some of my practice pieces, experimenting with different species in the fresh-cut green state. These are white birch and cherry.

So now those ambitious projects don't seem so daunting. I'll get there, a little bit at a time. It's like shop class in 9th grade. You get your one-hour time slot a few times a week.

If I can spend an hour on the occasional evening, that's enough to make some progress, and maybe it has to be set aside while the glue dries anyway. On weekends, a couple hours at a time is just right, take a break, enjoy some family time, don't wear myself out and get crabby. And if I don't get as far as I wanted to that day, no big deal. It will be there waiting for later.

That way, no matter how crazy the work and family schedule gets, I still get some time in the shop to appease the obsession.

Recommended Books

Saturday, October 24, 2009

My Roubo, part 3

(Go back to part 2)


Cutting the leg timbers in half. I knew I was keeping all those empty kitty litter containers around for something! A stack of them made a fine cutoff support.


Gang chamfering the foot end of the legs.


First method for sawing out the timber-frame-sized tenon cheeks at the top end of the legs.


Second method, since they were short enough. This turned out to be easier, better angle to see the saw exit so I didn't over-cut.


All four legs sized and tenoned, along with the slot in the foot of the leg that will be front left. This is for the leg vise. German bench screw is on order from Woodcraft.


Plowing the groove in the underside of the top for the sliding deadman using a Stanley 45. First time I've used it, so I sharpened up the plow blade with Mike Dunbar's "scary sharp/sensible sharpening" sandpaper system.

A brief digression: Sharpening is a big barrier for people trying to use hand tools; it was for me. It looks time-consuming and troublesome, bringing work to a halt. Dunbar calls it a gateway skill, opening up the hand-tool arena, because hand tools need to be really sharp to be usable. His system just works, no jigs, no messing around, 5-10 minutes to take a tool from flea market condition to razor sharp. Like any hand-tool skill, it takes a little practice, but not much, and you're back to doing what you want to do, working the wood.

To get set up, I ordered one roll each of  PSA sandpaper in 80, 120, and 320 grits, and several 5-sheet packs each of  wet-dry sandpaper in 600, 1000, and 1500 grits from Klingspor. I found tempered plate glass shelf pieces at Home Depot in the shelving section, a 36" piece for my dedicated sharpening station, and a 24" piece for carrying in a yet-to-be-built tool chest. Mike's original video used a 36" glass plate; in later articles he switched to aluminum plates due to the risk of breakage; I've seen people mention using MDF, Corian, and marble, as long as it's flat and stable.


The 45 did a great job, except that the skate left several inches undone at each end, and it bottomed out about 1/8" short of the required 1" depth. So I brought out the chisels and the number 71 router plane, extending its cutter past the normal depth adjustment. It was a little chattery, but worked quite well.


Final chopping at the ends. I didn't have a 5/8" mortising chisel, so I made do with a 3/8".

(Continue to part 4)

Friday, October 23, 2009

My Roubo, part 2

( Go back to part 1)

Next to make the legs. They'll be 5"x5" timbers. Massive.


Marking out width for a leg glue up. I only need to trim off about 1/2".


To rip or to scrub? That is the question. Let's try ripping first.


A 114"-long rip, 1/2" wide. About 1/2" progress per stroke, so roughly 200 strokes.


Crosscutting to the length of 2 legs.


Finishing off. I really need to build another mini Krenov-style stand like the one holding up the far end. Very nice design, mortise and tenon uprights to feet and stretcher, overlapped bridle joints at top. I built it a year ago, still haven't had to glue it up. Chris Schwarz sawbench under my knee.


How much wood would a scrub plane scrub if a scrub plane could scrub wood?


The chips literally fly when scrubbing on the diagonal.


Following the scrub with a transitional jack with aggressively crowned blade. Ripping and scrubbing are about the same amount of manual labor, but the scrub and jack are much more viscerally satisfying.


A long but rough curl. This jack is setup as a fore plane, the blade crowned between a scrub and a try plane, with a big wide mouth. Transitional planes are not just for burning!


One double-length leg glue-up, for 5"x5" finished. About 50 lbs.


Finishing squaring up a leg with a corrugated jack setup for trying, after roughing down with scrub and transitional jack. I'm standing on a 2x10 to get a little elevation over the work.


As Chris Schwarz says, coarse, medium, and fine tools. The squared-up legs ready for cross-cutting in half and trimming to length.

Next will be timber-frame style tenons for fitting to the top.

Continue to part 3

My Roubo, part 1

I'm building the Roubo-style workbench from Chris Schwarz's Workbenches. This is a great book, because it goes through in detail why the two included workbenches have the features they have, and how to accomplish various hand-tool operations on them.


The book calls for 8/4 Southern Yellow Pine, or whatever dense species is cheap and plentiful in your area. What do you do when all you can find is 5/4 and 4/4 stock? Buy more glue! This stack is 290 linear feet of 4" and 6" width, $501.72 at The Woodery in Lunenburg, MA.

The Roubo workbench is based on illustrations in Jacques-Andre Roubo's L'art du Menuisier (The Art of the Woodworker, 1769-1775). I love it's clean simple lines that belie enormous versatility.

It's massive. That mass makes it a stable work platform. It won't move when you're planing or chopping a mortise.


The top slab glued up and trimmed on one end. At 7'x24"x3.5", it probably weighs close to 200lbs.

And it's low; that's my biggest leap of faith in following this design, since it will just come up to the base of my pinky.

Roy Underhill describes a variation in his book The Woodwright's Guide. You can see it in this video. He describes the ideal height as just brushing your knuckles. Unlike modern workbenches meant for power tools, these are low to allow you to get over a handplane. Chris describes this as the secret to longer endurance handplaning.

Since I'm building this for hand-tool woodworking, I'm building it with hand tools. The only machines I'm using are my portable 10" planer to face all the stock, and my Shopsmith 4" jointer to joint the 6 top slab sections prior to final glue up. It's an ideal project for practicing and refining my skills. A minor mistakes here or there won't affect it's functionality; it's just sitting in my shop, not out for show.


Trimming the other end of the top. Under it is the sad excuse for a home-made bench I've been using. Started life as the kids' bench from Woodworking for Kids. Fine for the kids to beat on, but not for handplaning, even with added MDF top. Racks like mad. You can also see why my new bench will not have a bottom shelf.


Finishing off. The scrap end has already fallen off at a glue joint that failed due to planer snipe.

Continue to part 2.

Recommended Books